
由于在以太坊上做存储异常昂贵,故在以太坊上存数据非常不合适,通过ipfs存储则相对低廉许多,随着ipfs+filecoin的主网即将上线,将会大大的增加Dapp的落地,去中心化应用大范围使用将带来时代的革新。
我们将通过一个简单的例子来实现图片的存储功能,在此基础上扩展到其他领域更丰富的应用上。
安装ipfs,vue,truffle相关教程同学可自行搜索,这里就不详述了。
知识点:
- 熟悉VUE框架,熟悉VUE-element组件
- IPFS安装
- 以太坊智能合约、Ganache私链
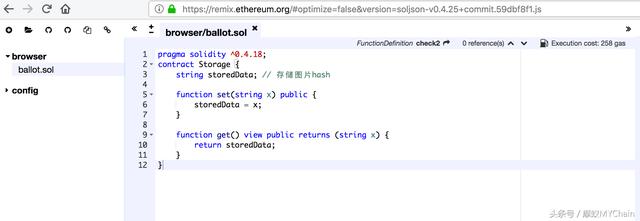
1.我们创建一个合约,命名为Storage.sol,同过简单的set,get方法来交互,代码如下
pragma solidity ^0.4.18;
contract Storage {
 string storedData; // 存储图片hash
 function set(string x) public {
 storedData = x;
 }
 function get() view public returns (string x) {
 return storedData;
 }
}
2.然后我们编写部署代码,把它部署到Ganache网络上
var Storage = artifacts.require(“./Storage.sol”);
module.exports = function(deployer) {
deployer.deploy(Storage);
};
3.部署,truffle migrate (关于部署命令的使用可以参考我另一篇文章有讲述)
xiaochen:eth xiao.chen$ truffle migrate
Using network 'development'.
Running migration: 1_initial_migration.js
 Deploying Migrations...
 ... 0x5d9db085d6e07d1e28101d65b76b0cee15e005b11dced2c2e4b4b614a7c9dbe5
 Migrations: 0xcd9dd13bfa90e3fe865cf5086b27344fb1961cbd
Saving successful migration to network...
 ... 0xd699867cff9a2304f6f365112333105187220cea9629ac45a24403fa5a8c7262
Saving artifacts...
Running migration: 2_deployed.js
 Deploying Storage...
 ... 0x7ca44266e4d13675e1e0148eaedc9b8c7ec67cfe2b98ef504c2c6e67e15fcc5a
 Storage: 0x76d67ce466789c471787732325eee15b47a56d00
Saving successful migration to network...
 ... 0x44c3e4da7b7806942af2eeb1f29e87b2c0b5b215f088f9d7c231c5ea7aae5e39
Saving artifacts...
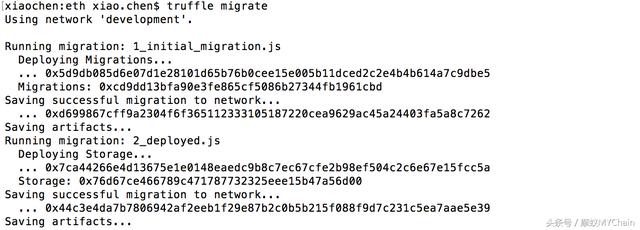
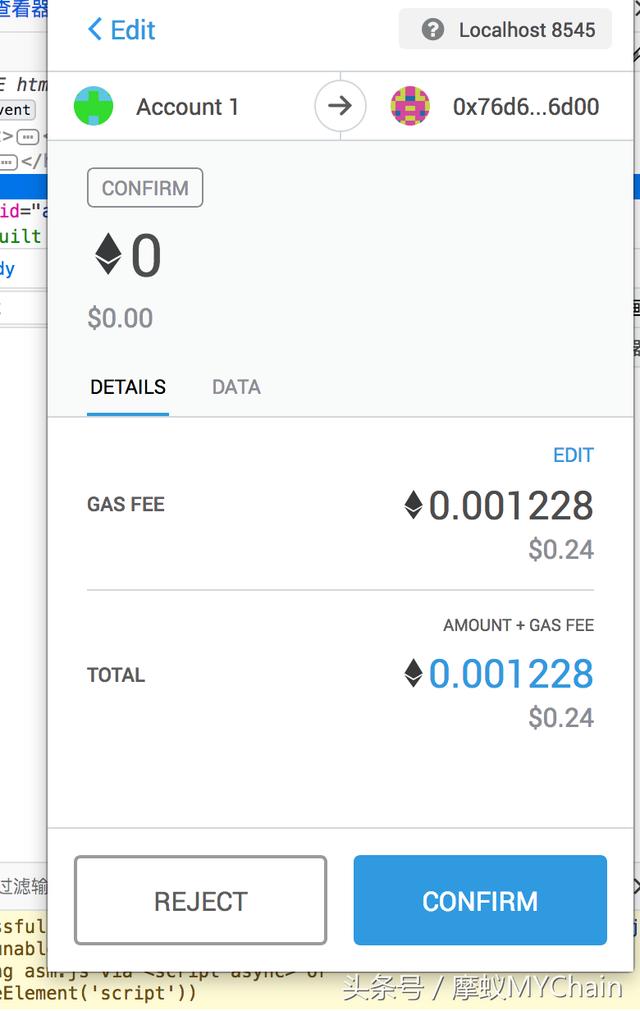
此处可见部署的合约地址是0x76d67ce466789c471787732325eee15b47a56d00。后续我们将会用到
以太坊部分已经完成了,接下来编写vue部分(安装vue、node这里不讲述,有兴趣的朋友可以自己搜索相关教程)
前端页面我们主要使用了ipfs-api接口,我们要提前安装好.
npm install —save ipfs-api
npm i element-ui -S
(文档安装地址:http://element-cn.eleme.io/#/zh-CN/component/installation)
我们简单建一个组件,暂时叫ipfs.vue,具体代码如下:
<template>
<div class=”container”>
<el-upload
class=”upload-demo”
action=””
ref=”upload”
:auto-upload=”true”
:before-upload=”onBefore”
accept=”image/jpeg,image/gif,image/png,image/bmp”
multiple>
<el-button size=”small” type=”primary”>点击上传</el-button>
</el-upload>
<br />
<el-button size=”small” type=”success” @click=”getEth”>获取</el-button>
</div>
</template>
<script>
const ipfsAPI = require(‘ipfs-api’)
let contractInstance;
export default {
name: ‘IPFS’,
data () {
return {
abi:[{“constant”: false,”inputs”: [{“name”: “x”,”type”: “string”}],”name”: “set”,”outputs”: [],”payable”: false,”stateMutability”: “nonpayable”,”type”: “function”},{“constant”: true,”inputs”: [],”name”: “get”,”outputs”: [{“name”: “x”,”type”: “string”}],”payable”: false,”stateMutability”: “view”,”type”: “function”}],
address:’0x76d67ce466789c471787732325eee15b47a56d00′,
from:’0xD6084bC70Ee9267E7E42E8A7ddB4e2E59c17D42D’
}
},
methods:{
upload2ipfs(render){
let that = this
// connect to ipfs daemon API server
var ipfs = ipfsAPI(‘localhost’, ‘5001’, {protocol: ‘http’})
let buffer = Buffer.from(render.result);
ipfs.add(buffer).then((response) => {
that.sendEth(response[0].hash)
//resolve(response[0].hash);
}).catch((err) => {
console.error(err)
//reject(err);
})
},
onBefore(file){
let that = this
let filename = window.URL.createObjectURL(file)
let render = new FileReader()
render.readAsDataURL(file)
render.onload = function () {
that.upload2ipfs(render)
}
return false
},
sendEth(string){
let that = this
contractInstance.methods.set(string).send({from: that.from})
.then(function(response){
console.log(response)
});
},
getEth(){
contractInstance.methods.get().call().then(function(res){
console.log(res)
});
}
},
mounted () {
let that = this
contractInstance = new this.$web3.eth.Contract(that.abi,that.address)
}
}
</script>
<!– Add “scoped” attribute to limit CSS to this component only –>
<style scoped>
</style>
main.js
// The Vue build version to load with the `import` command
// (runtime-only or standalone) has been set in webpack.base.conf with an alias.
import Vue from 'vue'
import App from './App'
import router from './router'
import ElementUI from 'element-ui'
import 'element-ui/lib/theme-chalk/index.css'
Vue.use(ElementUI)
import WEB3 from '@/common/web3'
Vue.use(WEB3)
Vue.config.productionTip = false
/* eslint-disable no-new */
new Vue({
 el: '#app',
 router,
 components: { App },
 template: '<App/>'
})
web3.js
import Web3 from “web3”
export default {
install: function (Vue, options) {
var web3 = window.web3
if (typeof web3 !== ‘undefined’) {
web3 = new Web3(web3.currentProvider)
} else {
web3 = new Web3(new Web3.providers.HttpProvider(‘http://localhost:8545’))
}
Vue.prototype.$web3 = web3
}
}
通过代码我们可以见到,需要涉及abi、合约地址、账号等信息。在ipfs网络上,我们主要是存img的database数据。
运行npm run dev。这一步,你的ipfs进程已经启动(ipfs daemon),实时同步到主网。选取一个图片上传,通过console.log可以看见已经成功
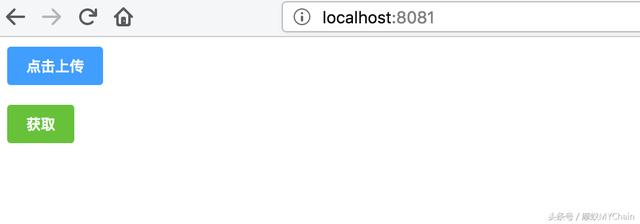
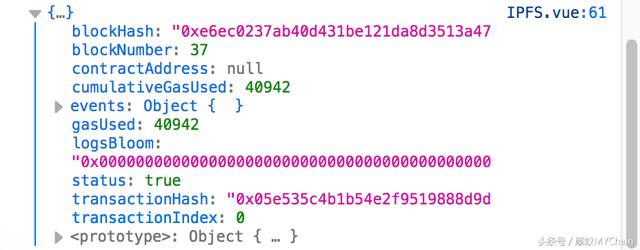
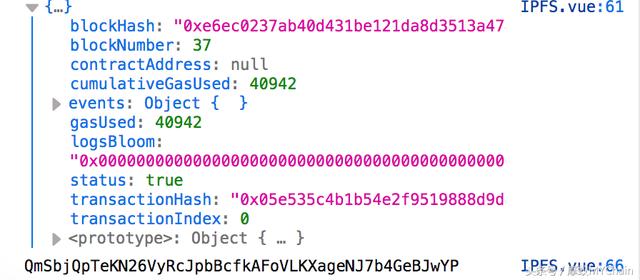
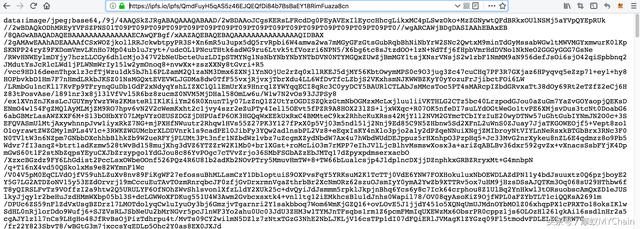
点击获取按钮,可以看见在ipfs上的hash值,并已经成功地保存在了以太坊链上。我们通过浏览器确认一下,输入https://ipfs.io/ipfs/QmSbjQpTeKN26VyRcJpbBcfkAFoVLKXageNJ7b4GeBJwYP,可以看见我们想要的结果了。
github代码库:https://github.com/cxbl1230/ipfseth
本文为作者原创,转载需说明出处